
Microgreens are small but mighty edible plants packed with flavor, color, and nutrition. Easy to grow at home, even in small spaces, you can use them to provide a substantial source of many vitamins and minerals even if you can’t afford expensive produce. But the benefits go beyond nutrition – growing microgreens at home can also provide a lucrative side income. Whether you’re interested in protecting your health or starting a side hustle, growing microgreens offers a fairly quick and easy solution. Here’s a comprehensive guide to help you get started.
What Are Microgreens?
Microgreens are young, edible plants harvested at an early stage of growth, just after the first leaves (cotyledons) have developed. They come from various plant families, including herbs, vegetables, and even some flowers. Popular microgreens include radish, broccoli, arugula, mustard, and basil. Despite their small size, they are often packed with more nutrients than their mature counterparts.
Why Grow Microgreens?
- Nutritional Benefits: Microgreens are rich in vitamins, minerals, and antioxidants. For example, broccoli microgreens contain high levels of vitamins C, E, and K, along with beneficial plant compounds like sulforaphane.
- Ease of Cultivation: Microgreens are incredibly easy to grow. They require minimal space and can be cultivated indoors or outdoors. The entire growing process takes just a few weeks, making it a quick and rewarding gardening project.
- Cost-Effective: Growing microgreens at home is super cheap. A packet filled with seeds costs just a few dollars, and you don’t need any fancy equipment. A simple setup can yield a bountiful harvest.
- Potential Income: With the growing interest in healthy eating and local produce, microgreens have become a popular item at farmers’ markets and restaurants. Selling your microgreens can be a profitable venture if approached with the right strategy.
Getting Started: Supplies and Setup
1. Choose Your Microgreens
Select microgreens based on your taste preferences and market demand. Popular choices include:
- Arugula: Peppery flavor, rich in vitamins A, C, and K.
- Radish: Spicy and crunchy, high in vitamin C.
- Sunflower: Nutty flavor, packed with protein and healthy fats.
- Pea Shoots: Sweet taste, high in vitamins A and C.
2. Gather Your Supplies
You’ll need the following supplies to get started:
- Seeds: Purchase high-quality, organic seeds from a reputable supplier.
- Growing Medium: Options include seed-starting soil, coconut coir, or hydroponic mats.
- Containers: Shallow trays or containers with drainage holes work well. You can use recycled containers, purchase purpose-built trays, or even use cardboard boxes.
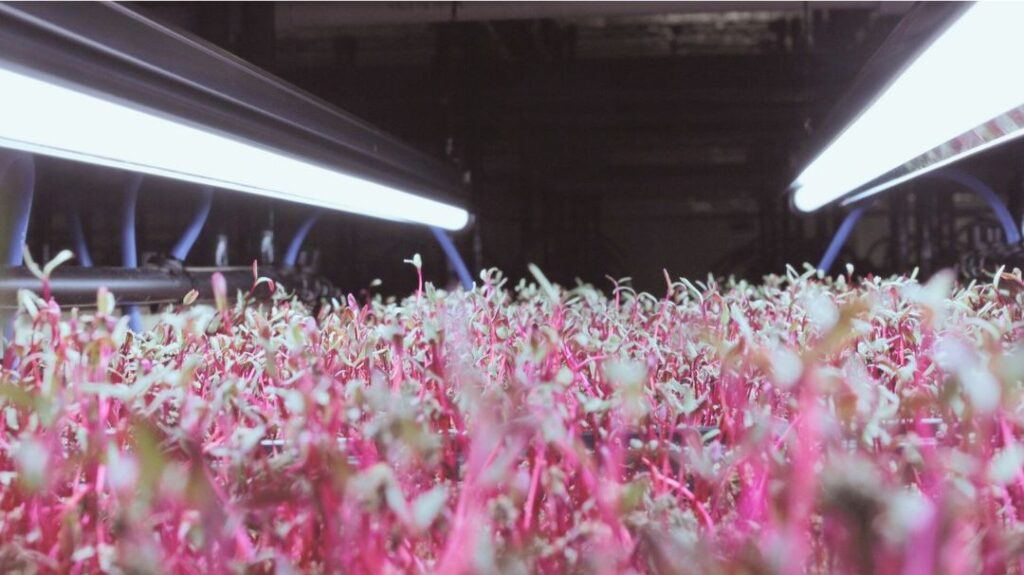
- Lighting: If growing indoors, use grow lights to ensure your microgreens receive adequate light. LED grow lights are efficient and effective.
- Watering Equipment: A spray bottle or gentle watering can is ideal for keeping the growing medium moist without displacing seedlings.
3. Planting and Growing Microgreens At Home
- Prepare the Growing Medium: Fill your containers with the growing medium, leaving about half an inch of space at the top. Moisten the medium before planting.
- Sow the Seeds: Scatter seeds evenly over the surface of the growing medium. Press them down gently but don’t bury them deeply. For small seeds, you can lightly press them into the soil.
- Cover and Water: Lightly cover the seeds with a thin layer of soil or another growing medium if needed. Mist with water to ensure the seeds are evenly moist.
- Provide Light: Place the containers under grow lights or in a sunny location. Microgreens need at least 6 hours of light per day, but many growers use 12 hours on, 12 hours off. Some growers swear by 18 hours on, 6 hours off to help them grow faster.
- Monitor and Harvest: Keep the growing medium consistently moist but not waterlogged. Microgreens typically take 7-21 days to reach harvestable size, depending on the variety. Harvest when the leaves are fully developed but before they start to yellow.
Selling Microgreens

If you’re interested in turning your microgreens into extra cash, consider these steps:
- Market Research: Understand your local market and potential customers. Farmers’ markets, health food stores, and restaurants are great places to sell microgreens.
- Branding and Packaging: Create appealing packaging and branding. Use clear containers or bags and create labels to highlight the freshness and nutritional benefits of your microgreens. Canva is easy and free to get started with.
- Pricing: Research local prices for microgreens to set competitive prices. Remember to account for your costs and desired profit margin.
- Networking: Build relationships with local chefs and store owners. Offer samples and showcase the quality of your microgreens to potential buyers.
- Online Sales: Consider setting up an online store or using social media platforms to reach a broader audience.
Tips for Growing Microgreens At Home
- Maintain Cleanliness: Keep your growing area clean to prevent mold and disease.
- Rotate Crops: To ensure a continuous supply, stagger planting times and rotate different microgreens.
- Experiment: Try different varieties and growing techniques to find what works best for you.
Conclusion
Growing microgreens at home is a fun, useful hobby and a potentially profitable side gig. Whether you’re looking to boost your nutrition or start a small business, microgreens could be just the thing you’ve been looking for to enhance your nutrition, protect your health, and bring in extra cash. With minimal time, space, and investment, you can enjoy fresh, nutrient-rich greens and explore new income opportunities. So, roll up your sleeves, start planting, and watch your microgreens—and your possibilities—grow.
Subscribe to Affordably's FREE weekly newsletter today!
What you can expect: Actionable tips to save money and stack cash Exclusive deals, insights, and strategies Real, no-fluff advice to help you live well on less
One thought on “Growing Microgreens At Home – Affordable Nutrition And Extra Cash”
Comments are closed.